Categories
Blog Campaigns courses Deeper Not Further Blogs Destinations gear Glacier Peak Fastpack Skills GPFP Highlights MBSS Mt. Baker Summit Climb and Snow Skills Preparation registered runners Resources for Registered Runners Runner Resources Skills Trail Skills and Equipment Trip Styles

Fast & Light Mountaineering Gear – UnPacked

This blog is meant to be a resource for anyone participating in an Aspire skills course involving snow and glacier travel. Due to the continuous dialing-in of gear for alpine missions, and the endless trade-offs with comfort and conditions, these gear recommendations are not black and white. For Aspire participants, we will have a pre-trip briefing to fine-tune gear selections. Anytime you are planning to venture into the mountains, it is a good idea to consult with your team about a gear strategy once you have an idea of the route, the conditions, and the weather forecast.


Footwear

This may be the most important piece of personal equipment for your trip. When we move in the mountains, our main connection to the terrain is through our feet. As we move into more technical terrain, we will increase our security of movement by using crampons and ice axes, but the bottom line is that our movement and our ground purchase is our primary source of security. Having the proper footwear for the task is paramount.

  • For Dakobed, we believe the conditions will be such that Trail Runners and Crampons (more on this later) will be adequate. Ensure your trail runners have plenty of life in their tread.
  • For Kulshan, we will be traveling extensively on glacier, pumice, and varied surface conditions, and so mountain boots will be required. 
    • Mountain boots come in many different varieties, and for this course, a 3/4 shank mountain boot is recommended. This describes a boot where the toe has a bit of flex to it, whereas the arch and heel of the boot are rigid. The boot should have a heel welt, but likely no toe welt and a well defined lugged sole.


Clothing System

The ultimate gray area in many ways, is your clothing system, although for some things, it’s fairly black and white.

It’s up to you what you want to travel on-trail in. Bring your most stylin’ fastest mountain movement outfit for the approach and descent!

During the steep snow and glacier travel portions of the route, long sleeves that cover the elbows, gloves and pants are required to mitigate hazards associated with self or team arrests.

  • Lightweight softshell pants are recommended. My personal favorite are the Arc’teryx Sigma FL pants. Fast drying, wind resistant, breathable, and lightweight are good things to consider.

Mountain weather is ever-changing and so having an assortment of layers is key. Make sure your layers pair well together, and can be worn all at once if needed. For a single overnight, we recommend only bringing one of each item listed on the packing list (Except socks, bring a pair of socks for each full travel day). Synthetic fabrics will perform better than cotton.


Sun Protection

In the alpine, there is very little opportunity for shade and the sun comes at you from all directions as it reflects off the snow surface. Having proper sun protection is more than just for your comfort, it is a matter of safety.

  • Glacier Glasses –
    • This is the most important piece of Sun protection, please take time to find a pair that fits your face. Glacier glasses have a darker tint than normal sunglasses and protect your eyes from harmful rays that may reflect off of the snow surface from the underside or periphery of your lenses. They should fit snug against your face, have side shields, and you should not be able to see much light seeping through from outside the rim. Light from above is okay, as you will likely wear a sun hat that will help protect you from above.
    • Arriving without adequate glacier glasses could be a trip ender, as snow blindness is more easily prevented than managed in the field.
  • Buff/Neck Gaiter –
    • This versatile piece of gear can make a huge difference over the course of a full day in the mountains. It can help add extra warmth, protect from the sunburn that wants to happen under your chin, double as a headband or hat, and be used to make a pillow when it’s time to bivy. 
    • ProTip: Stuff your rolled up puffy jacket or insulating layer into your buff as an on-the-go pillow.
  • In addition to these items listed, sunblock and a sun hat are worth their weight. Bring a small bottle of sunscreen for your face and consider wearing light layers to protect other exposed skin.

Safety Equipment

As I mentioned before, as we travel into more technical terrain, we need to think about increasing our security. Many hazards exist when traveling on glaciers and in the mountains, most of which can be placed into one of three categories: falling off the mountain, the mountain falling on us, or falling into the mountain. By equipping ourselves with the proper tools (In addition to meticulous route planning, continual assessment of conditions, and mindful travel) we can help to mitigate our exposure to these hazards.

  • Ice Ax
    • Lightweight and functional is key. Ice axes come in many different shapes and forms, but for the purpose of fastpacking, we want something that will give us purchase as we climb, and in the case that we need to stop ourselves from falling off the mountain.
    • For general fastpacking, you will be fine with a 40-55 cm length ax with an adze.
      • You will be glad for a shorter shaft when you are moving many miles on trail with this strapped to your backpack, and the Adze is more versatile than the hammer for glacier purposes.
      • Some lightweight options: Hummingbird, Gully, LiteRIDE, Ride
      • A very versatile axe, not as light: Sum’Tec
      • I will likely bring one of these: Sum’Tec or Gully
  • Aluminum Crampons
    • Aluminum is lighter than steel. It is also less durable, but we will be mindful of only using crampons when the ground surface necessitates it. Crampons also provide much more stability and purchase on steep icy slopes than micro spikes do. These will help us from falling off the mountain.
    • Given the nature of the terrain for each of our routes planned for this Aspire season, having legitimate crampons is a requirement.
    • If you already own steel crampons, you may choose to use them if they are compatible with the footwear you will be traveling with.
      • Note that for trailrunners, you must have strap-on crampons that do not require a toe or heel welt.
      • For 3/4 shank mountain boots, semi-automatic or strap-on crampons are likely to be compatible.
      • My recommendation: Leopard
  • Glacier Harness
    • Compared to a rock climbing harness, a glacier harness looks like a string bikini. It is basically the skeleton of nylon in a rock harness without the padding. The padding is omitted for a few reasons: it is not meant to be weighted for long periods of time, it is designed for alpine environments where insulating layers serve as additional padding, and its function is to be lightweight and non-restrictive to walking, skiing, or carrying a backpack.
    • A harness paired with a rope, is a way to mitigate the hazard of falling off of or into the mountain.
    • Investing in a good glacier harness can save a decent amount of space in your pack, and also be more comfortable during the climb. From personal experience, wearing a bulkier harness with a pack, over long distances causes some uncomfortable pinching on the hips.
  • Climbing Helmet
    • Head protection is important for all the categories of hazards we face. The important thing to consider in a helmet for glacier travel, is that it fits your head well, is lightweight, and breathable… enough so that you feel comfortable wearing it uphill and down. Make sure it is in good shape (no dents, cracks, UIAA approved, and manufactured within the last 10 years).
    • Note that lighter helmets are usually more breathable and comfortable, but must be cared for, as the trade-off here is durability. Hard shell helmets are adequate for mountaineering, however they are less comfortable, heavier, and not as breathable.

I hope this gear discussion has shed some light on the nuances of packing for a fastpacking trip, and helps you get in the right headspace for how to make decisions about gear. If you are gearing up for a trip with Aspire, I look forward to continuing to dial in our pack contents together, and fielding any other questions that arise.

Thank you for dedicating some time to preparing for your trip. We appreciate you, the mountain appreciates you, and hopefully, you will appreciate the effort you put into setting yourself up for success!

-Julie Ann Holder.


This blog explores the mountaineering element of our skills courses. You can also dig in to the companion resource for fastpacking gear.

Want to join Aspire on the mountain and learn fastpacking and alpine skills? Check out these courses for 2022:

Glacier Peak Fastpack Course – SOLD OUT for 2022
Mt. Baker Summit Climb and Snow Skills Course


Julie Ann leads Aspire’s mountain based skills courses and fastpacking missions, while also working as a mountain guide in the North Cascades, and teaching wilderness medicine courses.
Categories
Blog courses gear Glacier Peak Fastpack Skills GPFP Highlights MBSS Mt. Baker Summit Climb and Snow Skills Preparation registered runners Runner Resources Skills Trail Skills and Equipment Trip Styles

FastPacking Gear – UnPacked

FastPacking gear is lighter than general backpacking or mountaineering gear, but attempts to tackle similar environmental exposure over the course of fewer days. Carrying less food and less bulk or weight can allow one to move more freely, at a faster pace than one who is carrying an expedition style pack. All this said, the key to successful Fastpacking is to read the weather and conditions appropriately, and move fast-and-light when the time is ripe for it.

This blog is meant to be a resource for anyone preparing for an Aspire Fastpacking skills course. Due to the continuous dialing-in of gear for Fastpacking missions, and the endless trade-offs with comfort and conditions, these gear recommendations are not black and white. For Aspire participants, we will have a pre-trip briefing to fine-tune gear selections. Anytime you are planning to venture into the mountains, it is a good idea to consult with your team about a gear strategy once you have an idea of the route, the conditions, and the weather forecast.

Sleep System: 

The word ‘system’ is key. Any sleeping bag, sleeping pad, or shelter you choose, does not stand alone. They all work together to either make or break your sleeping experience. With some ground conditions, such as snow, your pad and shelter may need to be the most robust, whereas your sleeping bag may toe the line of temperature rating. At other times, shelter may rule out as the thing that takes up the most space (due to rain or inclement weather). When the weather forecast is high and dry, you may be able to get away with the most minimal of all three, and this is when Fastpacking is at its most prime. The most important thing is to ensure that your sleeping bag, pad, and shelter work together and are adequate for the conditions you might encounter in the mountains.

  • Sleeping Bag – 
    • How warm does it need to be? How packable? 
      • Weather Considerations: In order to answer these questions, you should first consider what the nighttime low temperature will be for where you are going. A good way to check specific weather forecasts is to visit NOAA for the area to which you are traveling. Using the inset map on the lower right hand side of the page, you can pinpoint your proposed camp location (elevation is important) and allow the page to refresh with the forecasted weather for that zone.
      • Weight vs. Warmth: Next you get to consider the trade-offs of having a warm night’s rest and carrying a little extra weight, or opting for a slightly less comfortable slumber and having a lighter pack. **You’ll notice this is a trend with most light-and-fast style missions.**
      • For the North Cascades in the summer, in good weather, you can get away with a 30 degree bag most nights, and other times, you may wish you had the 0 degree. My personal approach has been to travel with a lightweight 10-15 degree water resistant down sleeping bag and ensure that I pack it inside of a waterproof stuff sack, and pair it with adequate ground insulation and shelter (more on this next). If the forecasted temperatures are lower than 25 or the winds are expected to exceed 10-15 mph, I will likely also bring a silk weight sleeping bag liner, to add a little warmth.
  • Sleeping pad –
    • R rating? Thickness? Closed or open cell? Inflatable or foam?
      • If cushion is really important to you, bring a lightweight inflatable or open cell pad (Exped makes some good options), but MAKE SURE there are no holes in your pad, that it holds air all night, and that you bring a durable ground cloth (must be puncture resistant) that is larger than the footprint of your pad!
        • Ground cloth pro tip: Cut a section of Tyvek to size.
        • Open Cell/Inflatable Pad
          • PRO: Cushion for the joints and back, lightweight, packable
          • CON: Easy to pop/not durable, tends to be colder, difficult to field repair in alpine environments
      • When going fast and light I choose not to bring an inflatable pad. 
        • #1: Because I’ve had too many pop on me over the years. 
        • #2: Without a high R-value or an additional closed cell foam pad, I get too cold. 

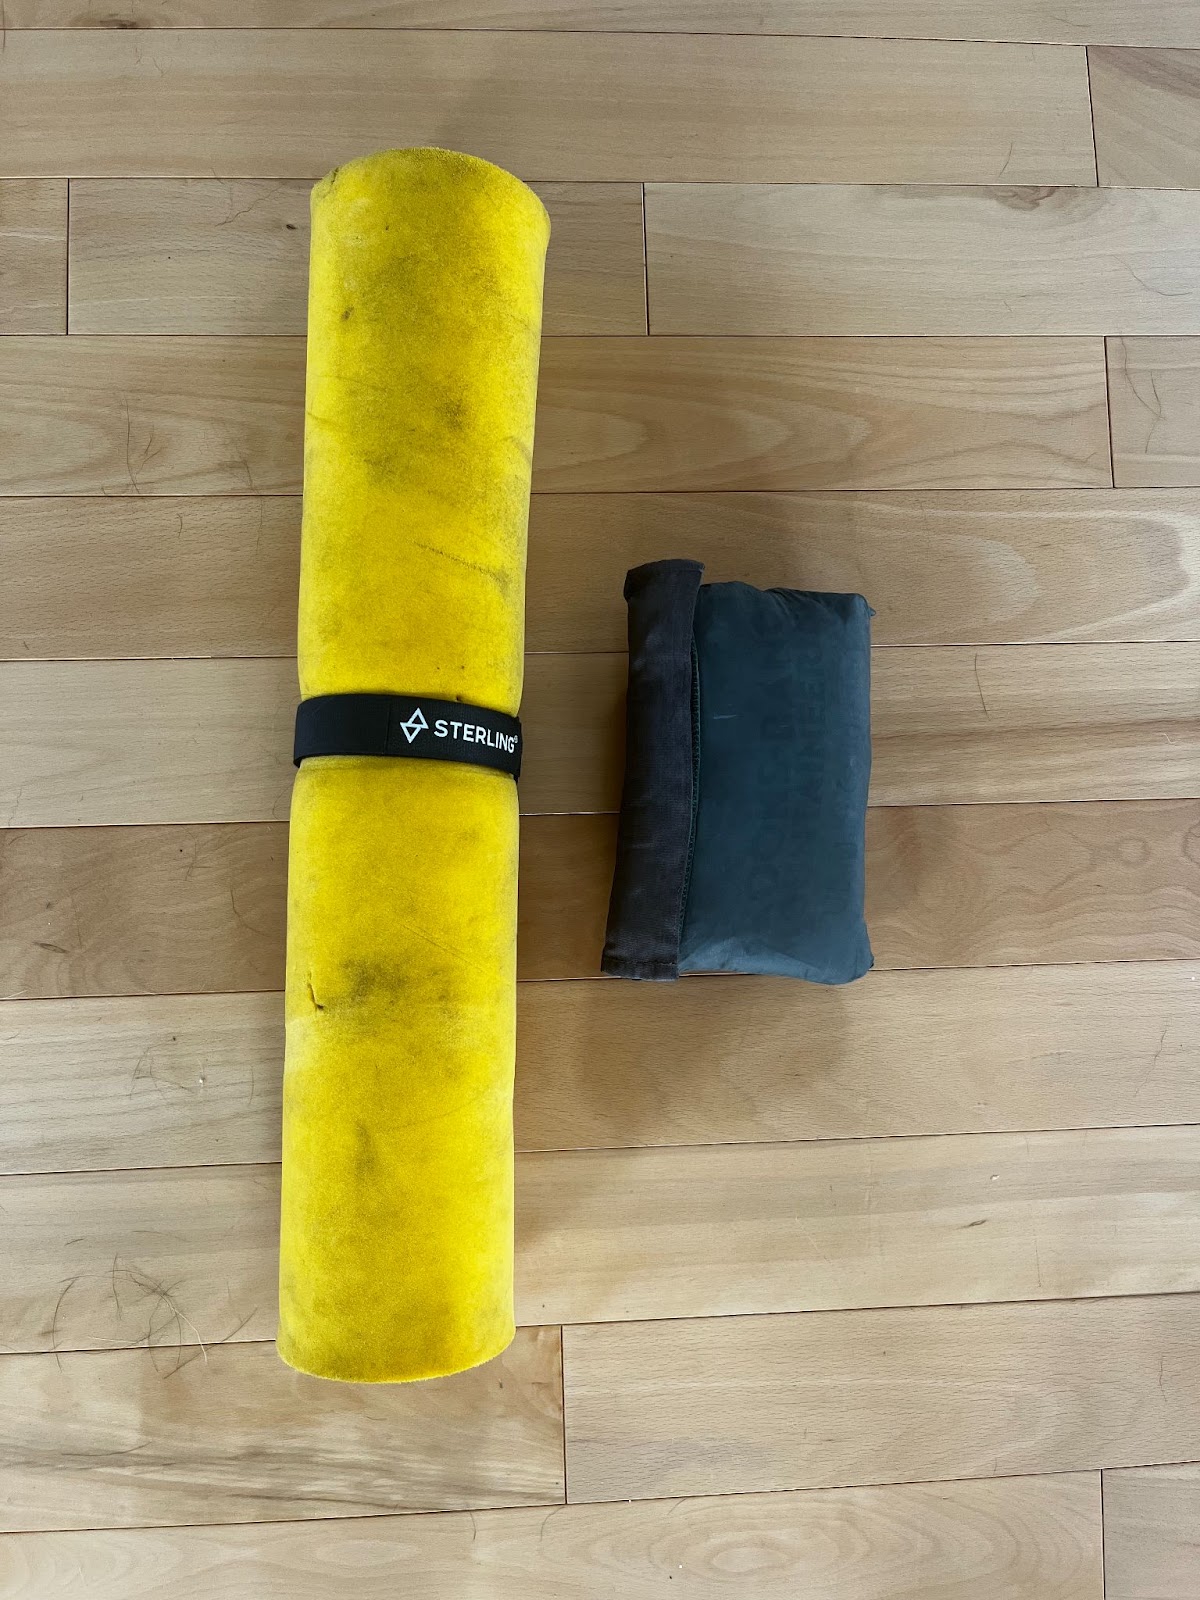
And so in my calculation of trade-offs, I choose warmth over comfort and bring a lightweight foam pad.

  • Closed Cell Foam Pad
    • PRO: lightweight, insulating, durable, can also be used around camp/as a yoga mat, etc.
    • CON: bulky, not as comfortable
  • Shelter –
    • Tent? Bivy Sack? Tarp? None of the above?
      • Consider the forecast… Precipitation? Snow? Wind?
      • Consider the environment… Trees? Snow? Rocks? Ground Surface?
      • Consider the number of nights out… one or multiple?
        • TENT
          • PRO: solid shelter from rain/snow/wind, adaptable to any ground surface, spacious, comfortable, bug screen
          • CON: heavy, bulky
        • TARP
          • PRO: lightweight, packable, good shelter from precipitation, good airflow
          • CON: sometimes necessitates an additional ground tarp, does not fair well in high winds, must have trees or trekking poles and stakes, no bug screen
        • BIVY SACK
          • PRO: lightweight, packable, can be solid shelter (depending on the type)
          • CON: tends to promote condensation inside the bag, claustrophobic for long periods of time
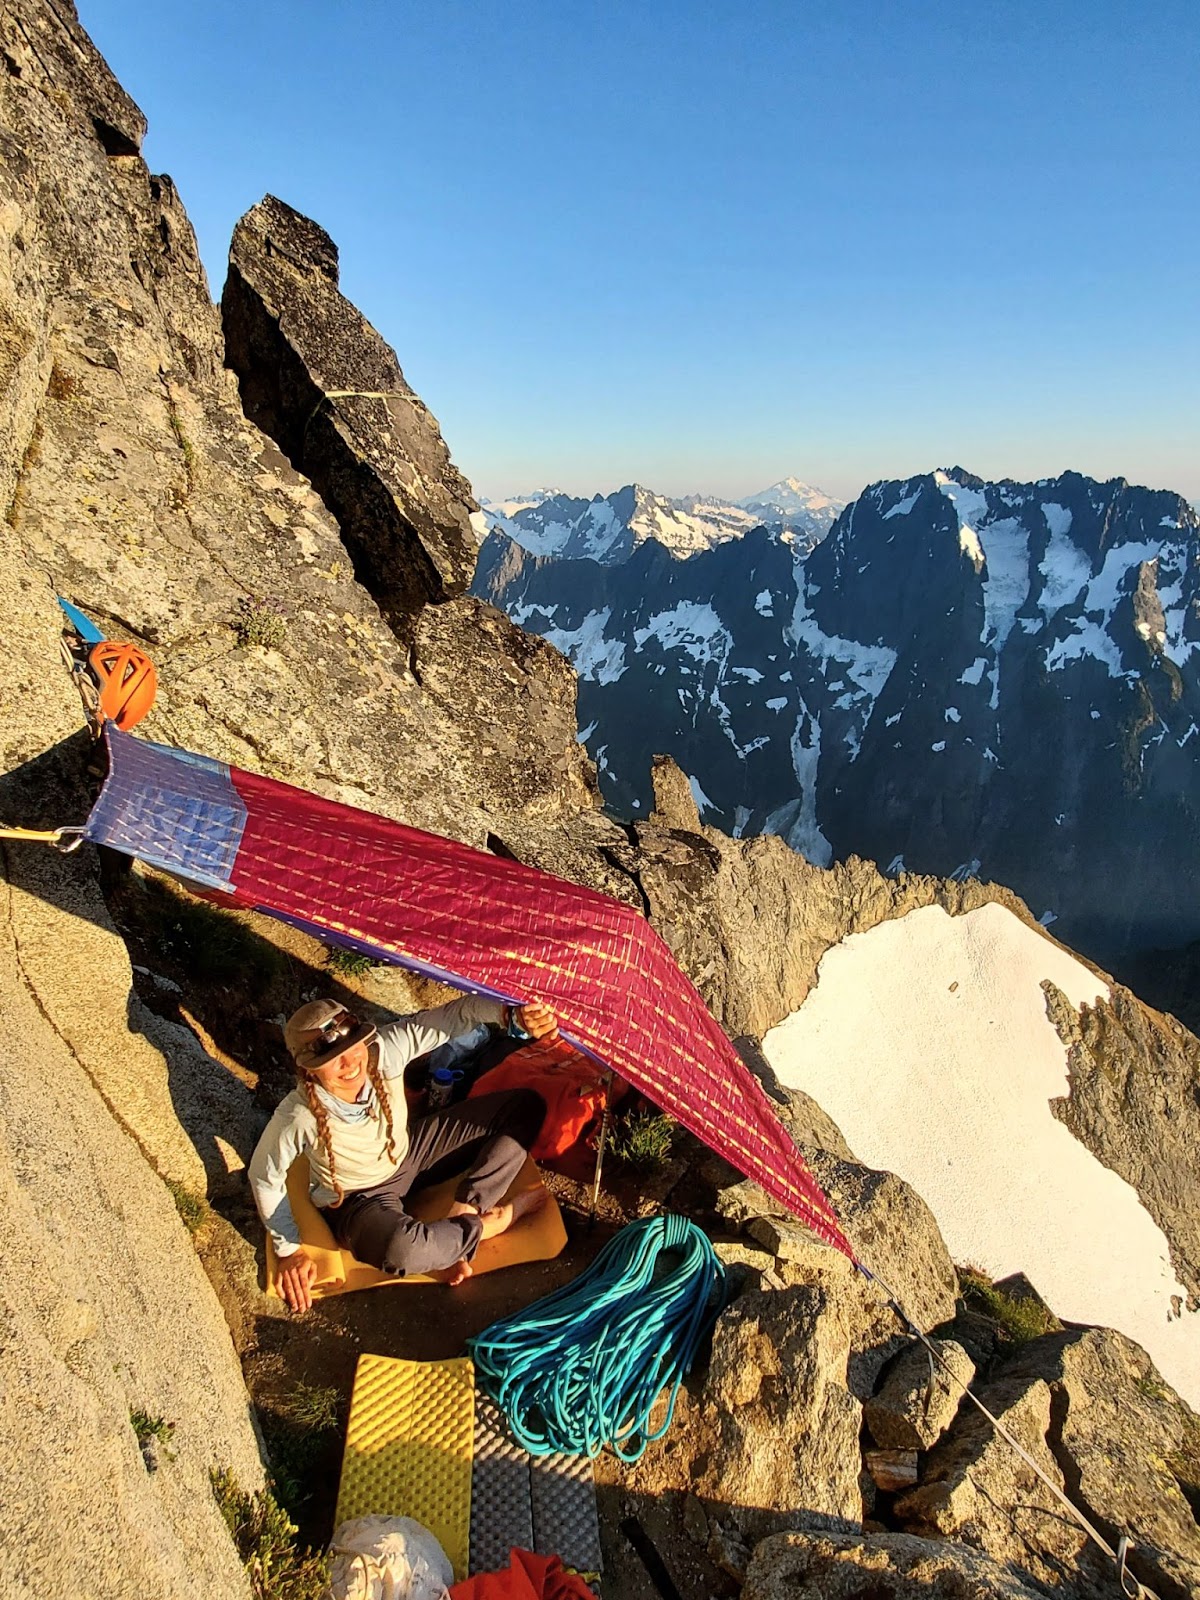
        • For the Aspire Skills courses on Kulshan and Dakobed, we will be camping above Treeline, on rocky surfaces, for one night only, and there is potential for any kind of weather (likely no insects). A lightweight waterproof bivy sack is recommended.
          • Given that we only have one night out, if you get wet, it will be okay. *If going out for longer missions, consider how to keep your gear dry, or the efficacy of synthetic versus down sleeping bags.

What is your guide bringing? Rab Neutrino 600 10 F Sleeping bag, MEC Zotefoams Evazote 5mm Bivy Sleeping pad, Brooks Range Ultralite Mini Guide Tarp (doubles as a bivy sack and tarp)

Cooking System

Every year, the cook systems are getting smaller, lighter, and more efficient. Although, no stove is all three. If you want efficient boil times in cold temperatures or high winds, you trade off a little bit of packability and weight. Some backpacking stoves are exceptionally small and light, although they tend to consume A LOT of fuel when trying to cook in cold or inclement weather. (We won’t even touch on how altitude influences these stoves.)

For the alpine environment of the North Cascades, I’ve found the integrated stove systems to be a favorite amongst mountain guides and recreational climbers. The JetBoil MiniMo allows you to simmer, whereas, the MSR Windburner has faster boil times, remarkably so when the wind is howling or the temperatures are below freezing. If you are looking to boil water for food, and melt snow for water, the MSR Reactor is the most efficient, albeit a little heavier. The MSR Windburner is next up in efficiency, a little lighter, but is hard to cook with (unless you tend to it very actively). The JetBoil stoves boast some of the more packable options, and have the ‘simmer’ option, but take their time reaching a boiling point on cold mornings or windy nights.

My tried and true stove for the North Cascades is the MSR Windburner.

Fuel is another consideration and depends on the number of people, number of meals, water source, water purification strategy, and style of meal.

For the Glacier Peak Fastpack course, we will be making two just-add-water meals, 2-3 hot drinks per person, and will likely find a water source along our route. We will discuss fuel amounts as a team. Usually a small canister for 2 people for one to two nights is adequate.

Food/Fueling

Moving fast and light, the easiest way to cut weight is to trim down on food. But we are asking our bodies to do a lot, so we need to give them the fuel they need to function properly. There have been huge improvements in freeze-dried and dehydrated meals in the last few years, so get excited and go find a meal that you can get amped up about!

Dinner Favorites: Good To-Go Kale and White Bean Stew, Mushroom Risotto, Thai Curry. Backpacker’s Pantry Pad Thai (lots of calories), also feel free to dehydrate your own meal (just make sure you work out the logistics of using the stove and cleaning it out if you share).

Breakfast Go-To: Breakfast is an important meal in the mountains. I like to bring a small bowl, some dehydrated coconut milk, and some tasty granola with nuts, seeds, and dried fruit. Get creative! Oatmeal is also an easy option and can be eaten straight out of the packet.

Pro Tip: You can use your empty dehydrated dinner pouch as your breakfast bowl. (Just make sure you eat all the dinner first.)

If you’re a coffee drinker, pick up some instant brew. If you like cream, sometimes I pair a Via with a Trader Joe’s Instant coffee where the cream is included. Add hot cocoa mix and you’ve got a mocha! 

Pro Tip: A 16 oz. Nalgene paired with a Coozie works great as a mug, and can also be used to dry your shoes!


Clothing System

The ultimate gray area in many ways, is your clothing system, although for some things, it’s fairly black and white.

It’s up to you what you want to travel on-trail in. Bring your most stylin’ fastest mountain movement outfit for the approach and descent!

During the steep snow and glacier travel portions of the route, long sleeves that cover the elbows, gloves and pants are required to mitigate hazards associated with self or team arrests.

  • Lightweight softshell pants are recommended. My personal favorite are the Arc’teryx Sigma FL pants. Fast drying, wind resistant, breathable, and lightweight are good things to consider.

Mountain weather is ever-changing and so having an assortment of layers is key. Make sure your layers pair well together, and can be worn all at once if needed. For a single overnight, we recommend only bringing one of each item listed on the packing list (Except socks, bring a pair of socks for each full travel day). Synthetic fabrics will perform better than cotton.

Personal Items

When it comes to personal items on a light and fast mission, consider bringing only the necessities. Some items that are recommended are a headlamp and a personal first aid kit for things like blisters, chafing, etc. Trim down your toiletries to a bare minimum, and consider bringing only the amount of toothpaste you need for one night (maybe even preload it).

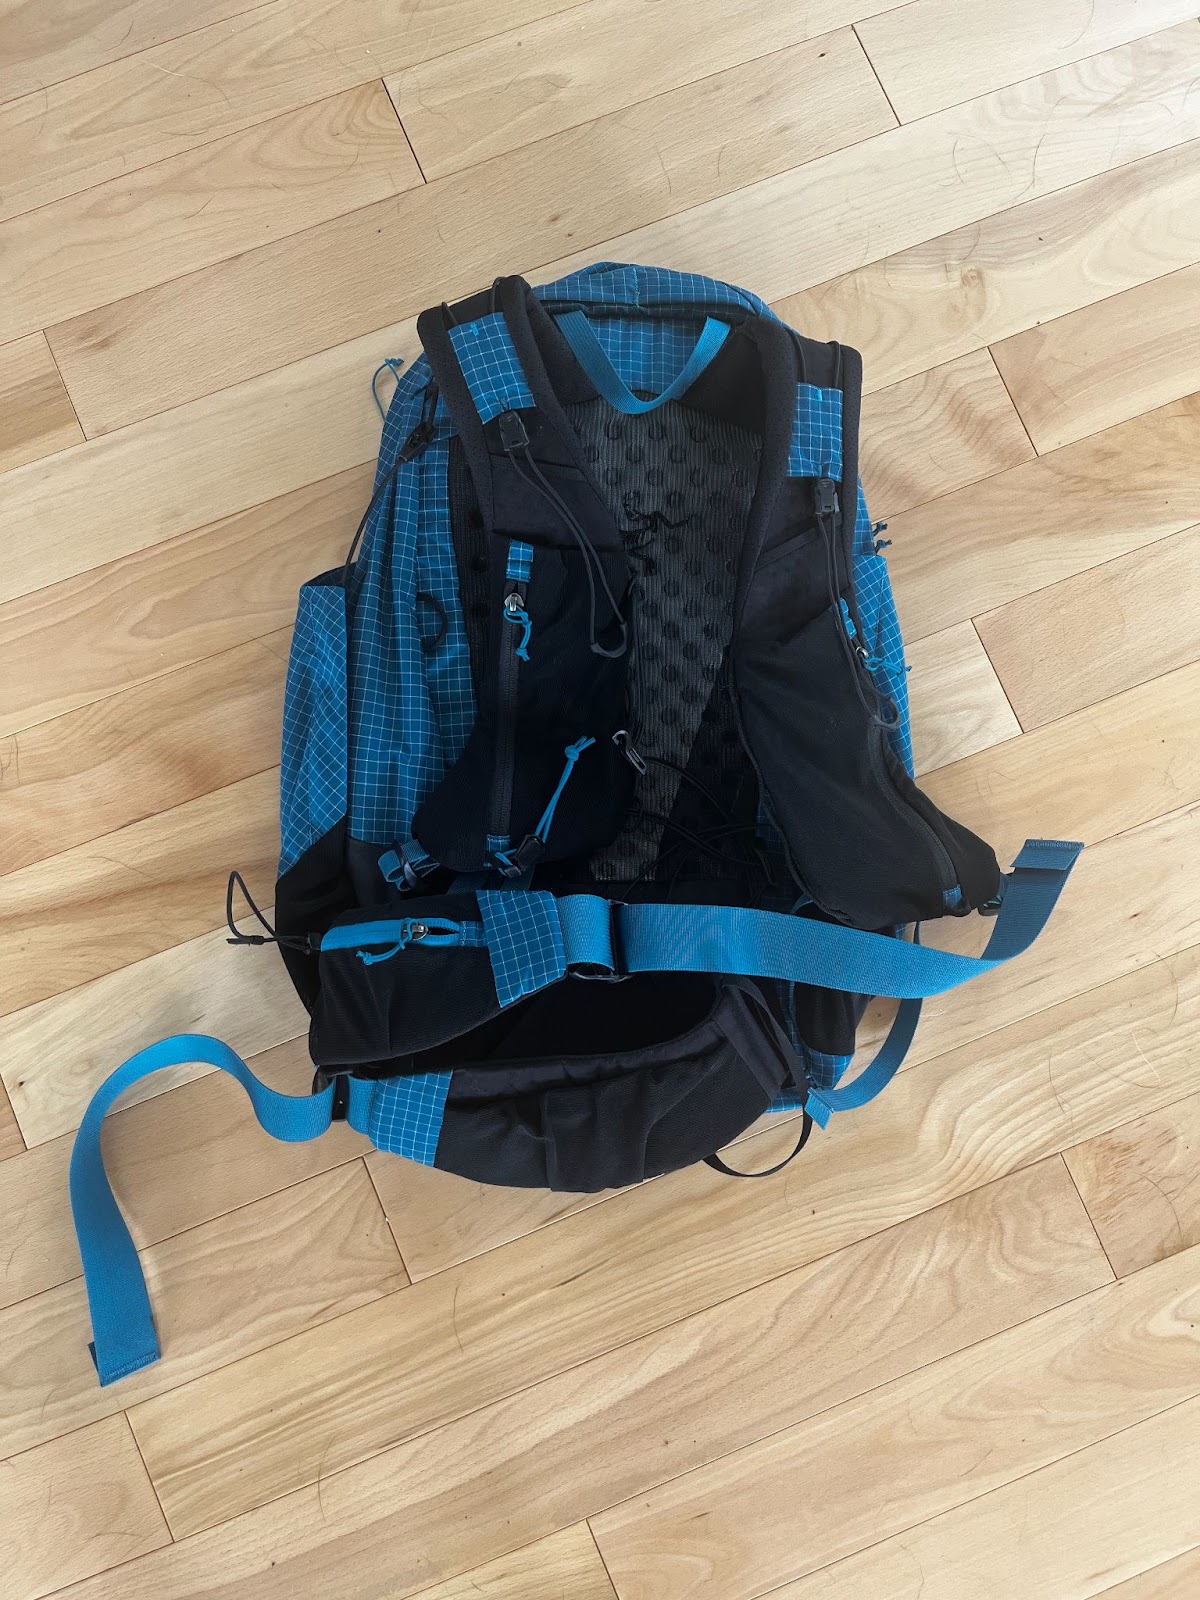
  • 15-30 Liter Pack
    • This is where the rubber meets the road in terms of all the gear you intend to bring on a fast and light mission… It all leads up to the fated question, will it fit in the backpack? If your plan is to go fast and light, a 30 liter pack should be the goal. And with that said, there is some wiggle room. A well fitting 35 liter pack can also get the job done, but be conscientious not to just fill space because you have it.
    • A welcomed side benefit of attempting a fast packing mission, is that you have an opportunity to be very selective with what you choose to carry, and to strive to bring only the things that are necessary, and that you will use.
    • What I look for in a good pack: well-fitted to your torso, lightweight, easy access pocket to water, snacks, etc., and a comfortable hip belt that is also low profile for ease of movement.
    • The current pack options I’m debating bringing: Aerios 30, Firecrest 28, Fastpackher 30

For those of you just testing the waters of whether or not fastpacking or mountaineering is something you derive enjoyment from, this can seem like a lot of gear to acquire… and I agree. My best recommendation to cut down on costs is to reach out to friends or local businesses to see if there is an option for you to borrow or rent these gear items until you have a better idea of how you want to invest. There are so many different varieties for each gear item listed in this blog, and each one is specific to how you will use it, where you will use it, and when. 

I hope this gear discussion has shed some light on the nuances of packing for a fastpacking trip, and helps you get in the right headspace for how to make decisions about gear. If you are gearing up for a trip with Aspire, I look forward to continuing to dial in our pack contents together, and fielding any other questions that arise.

Thank you for dedicating some time to preparing for your trip. We appreciate you, the mountain appreciates you, and hopefully, you will appreciate the effort you put into setting yourself up for success!

-Julie Ann Holder.


This blog explores the fast-packing element of our skills courses. You can also dig in to the companion resource for fast and light mountaineering.

Want to join Aspire on the mountain and learn fastpacking and alpine skills? Check out these courses for 2022:

Glacier Peak Fastpack Course – SOLD OUT for 2022
Mt. Baker Summit Climb and Snow Skills Course


Julie Ann leads Aspire’s mountain based skills courses and fastpacking missions, while also working as a mountain guide in the North Cascades, and teaching wilderness medicine courses.
Categories
Blog Food Highlights nutrition Preparation Runner Resources Trail Skills and Equipment Training Training Resources

Is nutrition your weak link?

By Vic Johnson, Mountain Sports Nutritionist

Recovery dinner on the beach, lot’s of greens to boot!

Have you ever busted a chain on your bike? I don’t recommend it. Once, during a xc mountain bike race, I was pumping hard uphill in a good position, when all of the sudden…”ping, whip!”, my chain snapped and came flying off. 

My knee came down hard on my top tube, and I hobbled my bike to the side of the trail, collected what I could of my broken chain, and did the walk of shame back to the finish line. Needless to say, the podium finish I was hoping for did not happen.

Just like a faulty chain on your bike could cost you a race, or at the very least, screw up your plans for a fun ride, inadequate fueling and poor nutrition habits could turn your long run into a death march. 

For big days in the mountains, it’s important to have your pre, during, and post run fueling strategy dialed in. No weak links, right?

Tacos, fully loaded.

What to eat BEFORE a big day in the mountains:

The main focus of your fueling strategy before a long run should be to top off your glycogen stores (the storage form of carbohydrate) in your muscles and liver. 

By focusing on carbohydrate intake the night before and morning of a big day, you’re essentially topping off your gas tank before you hit the road – you’ll be able to fill up along the way, but it’s nice to start out with plenty of stored carbs that your body will use for high intensity exercise. 

I always suggest that endurance athletes eat normal-sized meals (you don’t want to be overstuffing yourself) that include complex carbohydrate sources like rice, noodles, potatoes, other starchy veggies and whole grains.

For example, maybe the night before a big day you could eat sweet potatoes, rice, and veggies, and then the morning of,  you could eat some oatmeal, granola, or toast.

One thing that’s important to remember is that the closer you get to actually starting your run, the smaller portion you should eat. Two hours out? A full, normal sized meal should be ok. 20 minutes before? Something smaller like a half a banana or a granola bar might be a better idea.

It’s also important that you go into an event hydrated (but not overhydrated – your pee should be yellowish clear), and that you avoid high-fiber foods, as well as excessive fat and protein.

French toast for the carbs, berries for the antioxidants, whipped cream for the YUM!

What to eat DURING your big day out:

During a trail run, or ultra-type event, you’re most likely going to be hitting a couple different intensities and paces. 
At lower intensities (heart rate zones 1-3), your muscles are going to be primarily using stored body fat for energy. Even someone with relatively low body fat % could have over 100,000 calories stored as fat that they can tap into. 

At higher intensities (zones 3-5) your muscles REQUIRE carbohydrates to function optimally. That’s why it’s important to make sure to have carbohydrate sources with you so you can refuel. “Bonking” or “hitting the wall”, is when a runner has burned through all of their stored carbs, and is practically forced to bring their intensity level down. Bonking in the backcountry can actually be pretty dangerous.
In general, it’s recommended that for a run or adventure lasting more than an hour, your fueling strategy includes carbs every hour. Depending on duration and intensity levels, trail runners can benefit from anywhere from 30-90 grams of carbohydrate per hour.
For back-to-back, stage-race-style running, the higher end of that scale is probably best.

So what does that look like? 

Well, there are plenty of carbohydrate sources that a runner could eat during a big day. Everything from energy gel (20-30g of carbs) and sports drink (40-50 g of carbs)  to a classic PBJ or a potato wrap. (50-70 g of carbs). 

Practice makes perfect with endurance fueling, and you’ll have to play around with different sources and amounts of carbs to see what works best for you.

Working for it requires eating for it.

What to eat AFTER a long effort:

Following a long or more intense effort, it’s really important to make sure you are re-fueling well, so your body has the building blocks it needs to make adaptations. This is even more crucial when you are doing multiple long runs or adventures on back-to-back days. 

If you’re still feeling extra sore and beat up from yesterday, today’s effort isn’t going to be near as fun.

There are 4 primary aspects of recovery nutrition that I recommend for your fueling strategy:

1. Rehydrate (that’s a no-brainer)

2. 20-30 g of protein, especially the amino acid Leucine 

3. At least 20-30 g of carbohydrate 

4. Foods rich in antioxidants, such as berries, greens, and spices.

Including those nutrients in your recovery meal will give your body the building blocks that it needs to recover well and make the physiological adaptations that lead to better fitness.

This recovery bowl is calling to me right now.

An easy go-to recovery food is a smoothie. You can put plenty of carbohydrates (bananas, berries, citrus, fruit juice), protein (soy milk, dairy milk, nuts and seeds, protein powder), and antioxidants (greens, berries, spices) in a smoothie that make it a recovery powerhouse.

To sum it up:

Before = carbohydrate

During = carbohydrate

After = carbohydrate, protein, and antioxidants

If it feels intimidating to start incorporating every aspect of fueling into your plan, just start with one aspect. If you haven’t been eating before your long runs and adventures, start by trying to dial that in. With time and practice, you’ll be able to find a fueling strategy that works for you so you can feel strong, fast, and enjoy doing what you love.


Editor’s Note: Nutrition on Aspire Trips

Food is an integral part of Aspire trips. Running with us means highly nutritious meals calibrated to impress your taste buds and prepare your body for (often back to back) days on the trail.

Expect mornings packed with carbs and just the right amount of protein. Lunch is build your own sandwiches and wraps with a wide array of fixings, accompanied by an ample stash of all the bars, gels and electrolytes you’ll need for your trail miles. Dinners are nothing short of revelatory, but we won’t spill the beans on the menu just yet.

Special dietary needs? Let us know and we’ll make sure you’re taken care of.
Favorite beverages, bars, or snacks? We do that too!

We’re looking forward to breaking bread together! For more info, take a look into the Aspire kitchen on the blog.


Vic Johnson loves moving through wild places as efficiently as possible, and his goal is to help other outdoor athletes do the same.

He’s taught nutrition education to collegiate sports teams, and has coached triathletes, mountain athletes, and runners throughout the world. Learn more at www.mtnsportsnutrition.com.

Categories
Blog FAQ's gear Highlights Preparation registered runners Runner Resources Trail Skills and Equipment update What to Expect on Trips

What to Pack for an Aspire Trip

The right gear enables the adventure. While trail runners pride themselves on ultra-light packs and a minimal set up, there are some items that are a must. From our REQUIRED and recommended gear, to the playful (trail beers, anyone?), read on for our detailed gear list that will empower you to go further, lighter, and safer into the freedom of the hills.

Runners going deeper in the Goat Rocks Wilderness

Running Gear

The required gear list for Aspire trips consists of the following:

1) Your stylin’ running threads.

Pack for the variable weather of the alpine terrain and valleys in the Pacific Northwest. ‘Nuff said.

2) A Waterproof layer to keep you dry no matter what blows in

“There is no bad weather, only bad clothing,” as the saying goes. Hypothermia is no joke, and runners covering long distances are at increased risk as their bodies manage the prolonged output, nutrition, and the dance with the elements. Fortunately, the right layers can function as a panacea, keeping runners (mostly) warm and dry. Alpine weather can be fickle, and we recommend bringing multiple coverage options with you

Coverage level: Drizzle

For light rainfall and warmer temps, look no further than the Patagonia Houdini Air. A personal favorite of our crew, it’s packable, lightweight, and weather resistant.

Coverage Level: Active Rain
When it’s raining in earnest, your runner will need more between them and the elements. For solid coverage and higher output runs, the Arc’teryx Norvan SL Hoodie is as good as it gets. Lightweight with breathable Goretex Shakedry, this jacket is great for prolonged running in the rain.


Coverage Level: Inclement
Sometimes, you need to batten down the hatches. If you’re headed out into the maelstrom in search of your own strange brand of nirvana (ours too!), the Outdoor Research Foray is a great option. This jacket is built out with the features to stave off the storm. The Foray’s side zips run from waist to bicep. This means the jacket can be worn over a pack with ease. Leaving the side-zips open increases the breathablilty, keeping sweat from comprising dryness from the inside.

The Patagonia Houdini in action.

2) Insulating layer for warmth on those ridgelines.

A breathable insulating layer is critical protection at higher elevations and colder temps. Look no further than the Patagonia R1 Hoody. Lightweight, quick-drying and incredibly breathable during higher output runs. Given all this, it’s surprisingly warm making it the perfect mid-layer for daylong mountain treks and beyond.

3) Fly trail kicks. Don’t forget socks.

We’ll save the hours of talk about which shoes, which socks, and why for the trail. Don’t leave them at home (we’ve all done it).

4) Running Pack/Vest

Sufficient to carry approx. 1+ liters of water, food stuffs, and clothing over long miles.

Ultimate Direction makes some great options. They provide our crew with Adventure Vests for the season and we use their Fastpack 30 as our “Oh Shit” pack, so we’re fast, light and ready to respond in any situation.

5) A headlamp to light the way home

The Petzl Nao

Even the most experienced runners occasionally underestimate how long they’ll be out. Runners should be prepared for the unexpected and take headlamps out anytime they head onto the trail. Look for a torch with an output of 400 lumens or higher, with solid battery life. Light output decreases as the battery drains, so look for headlamps with battery life at or above 5 hours at full power for runners putting in miles in the dark. We like the Petzl Nao because of its 700 lumen output, stability, and rechargeable battery.

6) Emergency Blanket

Best case scenario, you carry one of these light weight sheets with them for years and it never leaves its neatly folded square. Worst case scenario, it saves your life. Don’t be caught in a backcountry pickle without one. REI has great options.

7) Pack a Water Filtration system and bottles.

Many of the areas where we run trips feature ample water sources. We require the capacity to carry 1-1.5 liters of water.

Trail runners ranging more than a few miles from the car (that’s you, Aspire runner!) will need to carry means of purifying their water. There are a plethora of options out there, from iodine pills to inline filters, to our suggestion for the fast and light… the Katadyn BeFree. It enables you to drink directly through the filter and it’s soft pack bottle saves space and weight. The Saloman XA filter is another good option with very similar technology and different flask sizes.

8) GPS Navigation

Modern technology means backcountry navigation has never been easier. Aspire requires that our runners hit the trail with some type of navigation. We encourage Gaia GPS, an app for smart phones that holds map layers and GPS tracks. A $20 subscription to Gaia Premium comes with extensive map overlays, making great gifts for trail runners who like to get into the weeds exploring remote mountain nooks and crannies. Note: GPS devices and apps are not a stand-in for backcountry navigation skills. Learn more about Aspire’s approach to backcountry navigation.

The Garmin inReach mini

Bonus: Some extra security for the loved ones waiting at home.

For an added level of safety, the Garmin inReach Mini features SOS, two-way text messaging, weather and location sharing. This device can make all the difference when things go sideways far from help.

9) COVID Mask

See our Covid-19 Guidelines for pandemic protocols.

Other recommended on-trail gear:

-Creams: Sunscreen, Anti-chafe, Lip balm.
-Hat & Gloves
-Poles
-GPS Watch, Camera, SPOT
-Hat, Visor, Buff
-Insulative Layer

Camping Gear

The shortlist of camping gear you won’t want to forget when packing for your Aspire trip.

Note: All personal gear must fit in a duffel or pack
for shuttling. Ideally this duffel would be
between 85-120 Liters.

Cush rental gear for the win!

-Sleeping bag, pad, tent *
-Personal toiletries and towel
-Post run comfort clothing and shoes
-Swimsuit, sandals, and beachwear
-Post-run wear, pants, insulative jacket, hat
-Rain jacket and pants
-Bug Spray
-Headlamp

Rental Kits

** A $150 gear rental package can be purchased that includes a sleeping bag, a sleeping bag liner, a sleeping pad, a pillow, and a 2-person tent from our friends at ExPed. We speak from experience when we say that ExPed’s set-up takes camp comfort to a whole new plane.

Show up with everything mentioned here and you’ll be well on your way to an incredible time in the mountains. See you at the rendezvous spot!

Big views on the Wonderland Trail
Categories
Blog Culture Highlights Preparation Runner Resources Trail Skills and Equipment Training Training Resources update What to Expect on Trips

East Coast Runner, West Coast Trails: A How To

How An East Coast Runner Can Prepare for a West Coast Aspire Adventure

By Ian Ramsey

So you’re coming west to run, hopefully on an Aspire Adventure Running Trip! And you live someplace that is . . . not the mountainous west. Maybe you live in Connecticut, or Minneapolis, or Tampa. Even if you live in a more mountainous locale like western North Carolina, the Ozarks, or the Berkshires, you might still be wondering about your ability to perform in different elevation and topography.


First off, know that there are lots of workarounds. Every year, runners who live at sea level (and often in urban areas) compete in mountain races at a high level. Stephanie Case, a UN civil rights lawyer, has been competitive in big mountain races like Tour de Geants and UTMB despite often training in compounds in Afghanistan and Sudan where her running was limited to a tiny rooftop and a set of stairs. Zach Miller won the JFK 50 after training on cruise ship treadmill. Briton Tom Evans has won CCC and podiumed at Western States despite living in Leicestershire, a moderately hilly part of England.

East Coast trails are often steeper (why make switchbacks when you can just go straight up and down?) and more technical (roots and rocks everywhere) than west coast trails. Living in Maine, I’ve rarely encountered west coast trails that were as technically challenging as the trails in New England. 

That said, the elevation on the west coast tends to be a bit higher, the distances further, the landscapes more wild. So how to adapt? How to train?


  • Use What You Have. 

Do what you can to mimic the terrain. If you live in an urban area and don’t have technical terrain, practice hopping from rock to rock or practice with an agility ladder. If you have small kids and can’t go far from home, do repeats around your block.  If you have smaller hills, then do hill repeats. Kaci Lickteig, winner of Western States and many other races, lives in Nebraska where her biggest hill is a 250 foot climb. So she does LOTS of hill repeats. If you live in Miami, find some stairs in a highrise. If you live in Boston, drive up to New Hampshire’s White Mountains for a weekend. If you need to stack up one end of your treadmill, do that.  Remember, humans are a highly adaptable species: we can figure things out.

  • Work on Speed and Aerobic Strength

At the end of the day, running is the name of the game here, and running is dependent on speed and aerobic strength. With that in mind, try to make most of your running relatively easy (aka zone 2), with some integrated speedwork to make yourself more efficient. You can integrate strides at the end of your run or pick one or two days to focus on them-they’ll tighten up your technique and develop your speed. Most runners make their easy runs too hard and their hard runs too easy. A great resource for this is Matt Fitzgerald’s book 80/20 Running: Run Stronger and Race Faster by Training Slower. 

  • Practice Power Hiking

The dirty little secret of trail running is that, for most of us, it’s often as much hiking as running.  Unless you’re Pau Capell or Clare Gallagher, you’re probably hiking, especially on the uphills, some of the time, maybe more. So you should practice that! One of my favorite training methods is putting on a twenty-pound weight vest and going for a hike (which could also be on a treadmill). You’ll build sturdiness and all of the small muscles involved in balance. If you might be hiking for, say, 25% of your mountain adventure, shouldn’t you train for it? Pro Tip: If you’re comfortable enough, leave the weight vest loose so it can swing around a bit and really build those little muscles. This is also an excellent chance to practice using poles!

  • Practice Nasal Breathing

Most runners breathe through their mouth much of the time, without thinking about it. Unfortunately, mouth-breathing is often a sign that the runner is moving into a predominantly anaerobic state and can only maintain that effort level for a short period of time as their nervous system y use short-term fuel sources such as glucose.

One way to train better endurance is to practice nasal breathing, which allows you to stay in an aerobic state, and burn fat as a primary fuel source. Nasal breathing also doesn’t get your nervous system ramped up, so you stay more relaxed (mouth-breathing is a physiological sign to the body of an emergency). Running while nasal breathing takes some practice, and initially, you’ll be running a bit slower, but your body will adapt over a few weeks. If you can run this way, you’re pretty much guaranteed to stay in Zone 2, which is very sustainable for longer distances.

Here’s a case study: A friend of mine in his forties ran the Vermont 100 a couple years ago, nasal-breathing only until mile 70. As a result, he felt relaxed and his nervous system didn’t get jacked up, and he finished sub-24 feeling great.

  • Leg and Strength Training

If you want to build durability and strength, try doing some cross-training. This can include everything from smaller strengthening exercises (clamshells, monster walks, etc) to using weight training.  I highly recommend the Pedastal and Myrtl routines (google them) as ways to strengthen your hips and adductors. Any single leg balance or core exercises will be very helpful for making you more sturdy. If you’re interested in getting into heavier weight-training (deadlifts, for instance are great for switching on and strengthening hamstrings), make sure you get some technical instruction so that you’re doing it right-you don’t want to get injured trying to avoid injuries! That said, weight-training is a great way to complement your running training and to reduce the number of miles you need to run in training, saving time and possibly injuries.

Overlooking the White Mountains. Photo Credit: Nick Triolo
  • Sauna

If you live at sea level, using a sauna or heating training can increase blood plasma volume and mimic some of the adaptations from living at elevation.  Generally, 20-30 minutes in a dry sauna sometime after a run can help with those adaptations and can also make you mentally stronger. Generally, it takes 2-3 weeks of daily practice to get most adaptations if you’re doing it consistently. After that initial period of adaptation, you can maintain the adaptations every few days to maintain the benefit.  

I’m also a big fan of using an ice bath with breathing exercises to train up my stress response and to drive down inflammation.

  • Complementary activities

One of the challenges of all this running training is avoiding injury, especially overuse injuries. With that in mind, I highly recommend doing some complementary activities to support your running: biking, nordic skiing, backcountry skiing, surfing, hiking. If you ever start to feel a niggle while running, hop on the bike or skis for a couple days before it escalates. That will allow you to maintain your aerobic base and strength without having to take time off. It will also keep you excited about running and make it seem less like a chore.

  • Practice with Your Gear

Chances are, if you’re coming from a less mountainous place, you may want to practice with backcountry running gear that you don’t always have a chance to use at home. Get to know your vest and where you like to store things so that you can pull them out quickly. Practice using a water filter. Make sure those gaiters fit your shoes and that your socks can get wet without blistering up your feet. How much rain and wind are you comfortable in with that light shell? Most of all, practice using poles (including where to store them on your vest) if you haven’t already practiced with them. Trying to figure out gear late in a backcountry afternoon makes challenging days less rewarding and more stressful.  And our goal is to make these adventures as joyful as possible.

Do you need to do all of these things? Probably not. Everyone has different strengths, weakness, propensities, and comfort levels. But the fewer variables and unknown you have to worry about, the greater your opportunity to be fully present to the adventure, to push yourself, and to have more fun!


Resources

Breathing: https://trailrunnermag.com/training/breathe-to-perform.html

Pedestal Routine: https://www.youtube.com/watch?v=wqtERE1oR1s

Myrtl Routine: https://www.njsportsmed.com/files/myrtl_routine.pdf

80/20 Running: https://www.8020endurance.com/


With three decades spent exploring the PNW and Alaska, Ian is based in Maine, where he directs the Kauffmann Program for Environmental Writing and Wilderness Exploration, and teaches writing, ecology, brain science, music and mindfulness to high school students. With over two decades leading trips and expeditions across the US, Alaska and internationally, he loves empowering people to take agency in their lives and discover new places. Ian is a poet and graduate of the Rainier Writing Workshop, and his writing has been featured in places like Terrain.org, Orion and High Desert Journal.  He also directs a community steelband, loves kayaking big water, drinks copious amounts of coffee, geeks out around nutrition, literature and fitness, and was once a member of an Inuit Dance Troupe.

Check out his website at Ianramsey.net

Categories
Blog gear Highlights Preparation Runner Resources Trail Skills and Equipment update

10 Essential Gifts for Trail Runners Who Want to Get Deeper

The perfect gifts for trail runners enable the adventure. While trail runners pride themselves on ultra-light packs and a minimal set up, there are some items that are a must. A good gift will empower the runner in your life to go further, lighter, and safer into the freedom of the hills.

Runners going deeper in the Goat Rocks Wilderness

1) A Rain Jacket to keep you dry no matter what blows in


“There is no bad weather, only bad clothing,” as the saying goes. Hypothermia is no joke, and runners covering long distances are at increased risk as their bodies manage the prolonged output, nutrition, and the dance with the elements. Fortunately, the right layers can function as a panacea, keeping runners (mostly) warm and dry.

Coverage level: Drizzle

For light rainfall and warmer temps, look no further than the Patagonia Houdini Air. A personal favorite of our crew, it’s packable, lightweight, and weather resistant.

Coverage Level: Active Rain
When it’s raining in earnest, your runner will need more between them and the elements. For solid coverage and higher output runs, the Arc’teryx Norvan SL Hoodie is as good as it gets. Lightweight with breathable Goretex Shakedry, this jacket is great for prolonged running in the rain (so everyday of a PNW winter).


Coverage Level: Inclement
Sometimes, you need to batten down the hatches. If your runner is the intrepid type who’ll head out into the maelstrom in search of their strange brand of nirvana, pick up the Outdoor Research Foray. This jacket is built out with the features to stave off the storm. The Foray’s side zips run from waist to bicep. This means the jacket can be worn over a pack with ease. Leaving the side-zips open increases the breathablilty, keeping sweat from comprising dryness from the inside.

The Patagonia Houdini in action.

2) Insulating layer for warmth on those ridgelines.

Know a runner who wants to stay warm? A breathable insulating layer is critical protection at higher elevations and colder temps. Look no further than the Patagonia R1 Hoody. Lightweight, quick-drying and incredibly breathable during higher output runs. Given all this, it’s surprisingly warm making it the perfect mid-layer for daylong mountain treks and beyond.

3) A headlamp to light the way home

The Petzl Nao

Even the most experienced runners occasionally underestimate how long they’ll be out. Runners should be prepared for the unexpected and take headlamps out anytime they head onto the trail. Look for a torch with an output of 400 lumens or higher, with solid battery life. Light output decreases as the battery drains, so look for headlamps with battery life at or above 5 hours at full power for runners putting in miles in the dark. We like the Petzl Nao because of its 700 lumen output, stability, and rechargeable battery.

4) The Stocking Stuffer: an Emergency Blanket

Best case scenario, a runner carries one of these light weight sheets with them for years and it never leaves its neatly folded square. Worst case scenario, it saves their life. Don’t be caught in a backcountry pickle without one. REI has great options.

5) Bye-bye water bulky bottles: Pack a Water Filtration system

Trail runners ranging more than a few miles from the car will need to carry means of purifying their water. There are a plethora of options out there, from iodine pills to inline filters, to our suggestion for the fast and light… the Katadyn BeFree. It enables you to drink directly through the filter and it’s soft pack bottle saves space and weight. The Saloman XA filter is another good option with very similar technology and different flask sizes.

6) For the modern trail hero: A GPS for your phone

Modern technology means backcountry navigation has never been easier. Aspire requires that our runners hit the trail with some type of navigation. We encourage Gaia GPS, an app for smart phones that holds map layers and GPS tracks. A $20 subscription to Gaia Premium comes with extensive map overlays, making great gifts for trail runners who like to get into the weeds exploring remote mountain nooks and crannies. Note: GPS devices and apps are not a stand-in for backcountry navigation skills. Learn more about Aspire’s approach to backcountry navigation.


The Garmin inReach mini

Bonus: Some extra security for the loved ones waiting at home.

For an added level of safety, the Garmin inReach Mini features SOS, two-way text messaging, weather and location sharing. This device can make all the difference when things go sideways far from help.

7) Running packs make it all possible

It goes without saying, but you couldn’t carry any of this gear over miles of backcountry without a pack. For day trips, the Patagonia Slope Runner sits well, has a great strap system for added weight distribution control, and just the right amount of pockets for staying organized.

If your runner is the type to bring along the gourmet crackers, chevre, and a bottle of whiskey on any adventure, or head out for overnight fastpacking adventures, the Ultimate Direction Fastpack 25L will get them there. It’s synching strap system, front pocket arrangement, and durability make it our pack of choice for the Aspire emergency pack we send out when things go down, and it won’t do you wrong. Packs take a lot of use and abuse, making new options great gifts for trail runners.

The Ultimate Direction Fastpack 25L in action on the North Cascades Traverse.

8) For the Strava addict: A Running Watch

Watches designed for trail running boast a host of features including heart rate tracking, GPS, further fitness metrics, an altimeter (useful for navigating in rough conditions) and of course…the time. In a world of endless options the right watch for your runner will depend on their style of exploration and the other gear they carry. For value, we like the Coros Apex.

9) For the modern world of running: an athlete’s mask

Someday in the not-to-distant future when masks may be a strange memento of a stranger time. Until then, your runner can mask up in style with these moody mountain-scape masks from Territory Run Co.

10) For the runner who has everything: Give an Aspire Adventure Running trip

Once your runner has what they need to get out there, there’s no better gift than the gift of adventure (bonus gifts of laughter, friendship and sweeping views included). Book an Aspire trip for your runner for summer 2021. From iconic locations like Mt. Rainier and Yosemite National Parks, to hidden gems like our Nooksack Ridgelines Rendezvous and our newest stage trip in the Goat Rocks Wilderness, Aspire trips promise memories that will last much longer than anything material.

It’s true, you can’t roam buck naked into the backcountry, spooking the squares and galavanting with bears and call that safe. You do NEED to travel with things. Hitting the hills with the gifts for trail runners covered here will mean your runner is well prepared for the challenges the mountains may bring.

Check out our full calendar here and we’ll see you on the trails! Happy holidays!

Big views on the Wonderland Trail
Categories
Blog gear Highlights Preparation Runner Resources Trail Skills and Equipment

Trail Running Gear Review: Katadyn BeFree Water Filter

The right gear can be the difference between an incredible journey through the backcountry and a miserable slog on the trail. While guiding and exploring, we’ve found some favorites and not-so-favorites. Here we’re sharing detailed gear reviews so you can go prepared.

The Gear: Katadyn BeFree Water Filtration System

The Specs:
– .1 micron hollow fiber filter
– .6 liter or 1 liter soft flask available
– filters up to 2 liters of water per minute
– filter removes bacteria, cysts, and sediment
– easy to clean

Our Take: Effective and efficient water filtration is a cornerstone of the ability to run deep into wilderness. The technology that fuels filters has come along ways in recent years, and when the Katadyn BeFree hit the scene it altered the way we thought about backcountry hydration. The filter is built to screw on and off the soft flask water bottle it comes with. It’s light, super compact when empty, and filters incredibly quickly. These key features make it ideal for anyone traveling where water sources have a solid and reliable flow.

Further Considerations: The BeFree is well suited for most situations we find ourselves in, however there are a few considerations to keep in mind to guarantee it meets the needs of your trip.

-Capacity-
1 liter is enough water capacity between streams for some mountain routes, but on dry trails and in drier climates, I recommend bringing along a few extra bottles to filter into to raise your capacity.

-Fit-
Your running vest will need a big pocket somewhere.
When the 1 liter soft flask is full, it’s too big for the front chest pockets of all but one of my running vests. I’ve fastened some loops on to my vests that hold the top in place as a hack for this issue, but it can be obnoxious to manage the top bouncing around outside the pocket. After a few drinks from the flask, this problem begins to resolve itself.

-Particulates-
Over time, the filter will clog and filter speed will decrease. Running the Loowit Trail around Mt. St. Helens last summer, the high concentration of silt and ash in the glacial run-off from that blown out mountain lead to clogging at a much faster rate. Cleaning the filter by shaking it back and forth in water helps restore flow rate to an extent, but the next time I run a trail with similarly clouded water sources, I’ll likely opt for my SteriPen to decrease the load on the BeFree.

-Water Depth-
One significant catch with the BeFree; to fill the soft flask where water is still, a scooping motion is required. To scoop well your water source needs to be deep or have significant flow. There have been situations where I’ve had to build a waterfall into a shallow stream to slowly fill the soft flask, which can be tedious or impossible. Shallow water presents a challenge for many filtration systems, but in the case of the BeFree it can be particularly challenging.

scooping water into the soft flask

The Wrap: The BeFree makes water filtration a breeze in many situations. It’s not a flawless system, but it’s the best approach for many wilderness adventures.
The Katadyn Steripen and Sawyer Squeeze and In-Line filtration systems are other options well suited for extended backcountry trail running. In addition to any filter in my pack, I always keep a back-up supply of iodine in case of emergency.
However you choose to purify, stay hydrated out there! Happy trails!

You can pick up the Katadyn BeFree here.

Trent Banks is a mountain rambler, a disc jockey, and father of two daughters, based out of Bellingham, WA. He joined the Aspire crew in 2018. You can find him playing clubs and livestreaming DJ sets, working aid stations at races across the Pacific Northwest, and guiding trips with the rest of the Aspire team. 

Categories
Blog Highlights Preparation Runner Resources Trail Skills and Equipment Training

Springtime Snow Research

Every year around early May, the daydreams start climbing with the temperatures toward the alpine single track of high summer. Meanwhile, running in the spring mountains often means running in winter conditions, complete with snow and frigid weather. That is, unless you do your research.

Resources for scouting snow levels from home are more sophisticated than ever. With the right tools, runners can uncover those spots that melt out first, stay dry, and run easy. We use a handful of trusty resources when planning early season trail running adventures in higher elevations. We’ve shared them here as a resource to propel your adventures.

1) Basic Considerations

If you’re anything like us, you can get LOST in research online. Before you dive in to the web, dust off the paper maps and start dreaming while you look for the following details:

-Generally speaking, lower elevation means less snow, sooner.
-Look for trails on the south facing aspect of a mountain, where the slope is exposed to the sun throughout the day.
-Consider areas in the rainshadow, where snow accumulation may be lower. Microclimates can be your friend!
-Snow can linger in forests well after it melts off open hill sides, so consider trails in areas with less tree cover.

Panhandle Gap on the Wonderland Trail, Mount Rainier National Park

2) Check Local Trip Reports.

Once you’ve got some places in mind, the first line of exploration in the research arsenal is trip reports.
In WA state, we love Washington Trails Association’s page here. You can search through recent trips and/or search out a specific trail and read recent reports. Valuable info on trail conditions found in these reports can make your trip a success.
Outside of Washington, Summit Post is a great first stop and hosts a similar, searchable catalog of trip reports usually geared towards peak bagging. Local hiking groups are also a great resource.

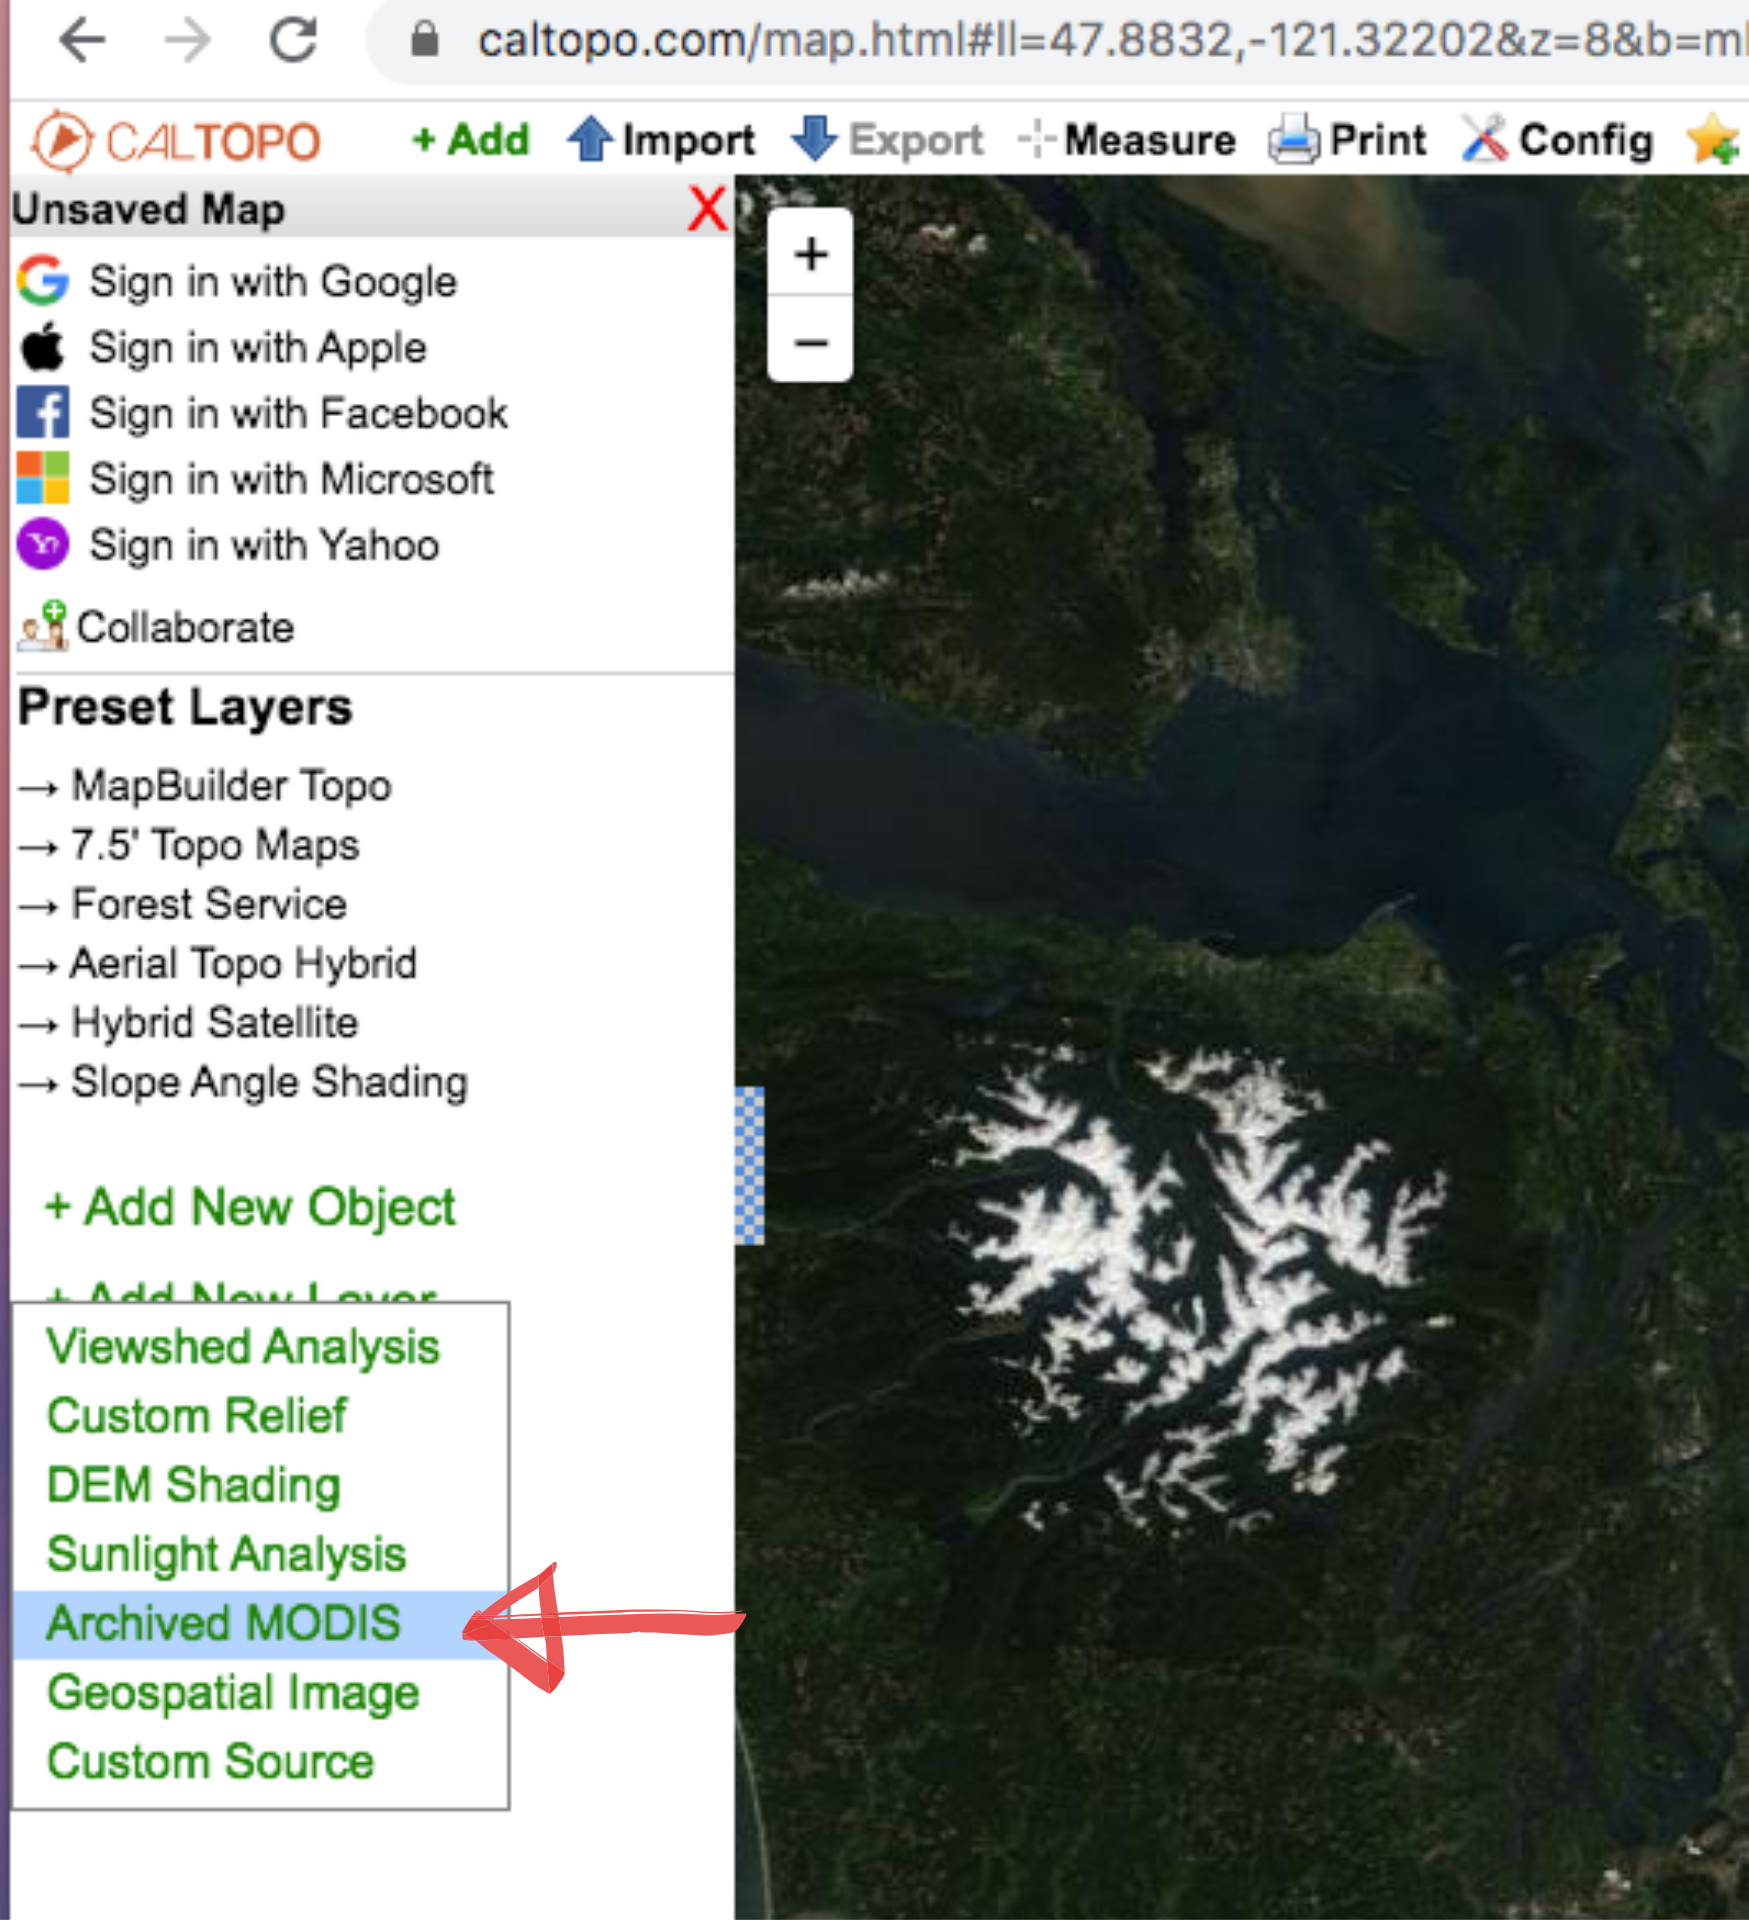
3) Utilize CalTopo layers.

CalTopo layer toolbar

CalTopo is a powerful backcountry mapping tool that allows you to explore and plan your trips with a wealth of information. You can add layers to show land management boundaries, slope aspect, and important here, recent satellite imagery from NASA via the MODIS layer.

Here’s how:
-Go to CalTopo
-Below ‘Preset Layers’ on the left toolbar, select ‘add new layer’ and then select ‘Archived MODIS’. A pop-up will then give you an option to select the day you wish to reflected in the layer, giving you incredibly recent intel.
-You can now select other layers, some of which (like the ‘hybrid satellite’ layer) you can combine with the MODUS layers to gain a better understanding of where you’re likely to find snow, or not.

MODUS layer, with snow shown in white

4) Check SnoTel data.

There are over 700 SNOTEL sites scattered across the American West. These are remote backcountry weather stations that are constantly recording and transmitting weather data from deep in the mountains. Through reviewing a map of SNOTEL sites, finding stations near your desired destinations, and reviewing the 7 Day Hourly Table for those sites, you can gather data about the general area you are considering.

SNOTEL data includes hourly readings of snow depth, snow water equivalent, and temperature.

5) Go prepared.

We couldn’t write a post on springtime alpine trail running without emphasizing the importance of what’s in your pack.
Make sure to leave the car prepared for the unexpected. Along with the 10 Essentials, consider a little extra food and microspikes and/or an ice axe for use in case your route proves tougher than expected.

trail runners on Church Mountain
Categories
Aspire Culture Blog courses Culture Highlights Preparation SUCIAWFA Trail Skills and Equipment Wild

Misadventure on the Wind River High Route

Adventure and misadventure are separated by a thin line. Most times we operate on the safe side, but all too easily incidents and accidents can push us into emergency response. Are we as runners prepared for those moments? How vulnerable are we to injury, accident, and death? It behooves us to learn from other people’s accidents, so we are more prepared to respond when we end up on the flip side of the perfect mountain adventure. 

When I heard Gabe’s scream, every alarm bell in my brain went off. The pain searing his scream was unmistakable and instantly my stomach knotted with nausea. Something was wrong, very wrong. Up to that moment I had been in awe of the alpine splendor of the cirque we were navigating, now the surrounding crown of peaks felt like a prison. Gabe had disappeared, swallowed by the mobile home-sized boulders that lie in every direction. After a flash of panic my resolve steeled and I prepared for the worst. I had no idea what I was going to encounter when I found Gabe – if, I found Gabe. But first, I had to find him.

The two of us had been side-by-side just moments before. We were descending a massive boulder field in the heart of Wyoming’s remote and wild Wind River Range. We were attempting the Wind River High Route, a 98-mile route along the crest of the range. With over 60 miles off trail travel, two 13,000’ summits, and a multitude of 12,000’ passes, there was little room for error in our planned 48-hour single push. 

We had just been chatting about how the route was so gnarly and unforgiving, it would be impossible without the aid of trekking poles. We hopped massive gaps between equally massive boulders. Realizing we moved faster on snow, we separated, exploring two different tongues of snow reaching up from the valley into the boulder field. With any luck, one would prove to be safe to travel down and speed our descent. When Gabe disappeared, we were many miles from the nearest hint of trail.  The feeling of isolation was overwhelming. 

After several time bending minutes of searching, I found Gabe pulling himself out of a hole between several boulders the size of minivans. While searching for him my mind had instinctively reviewed the hundreds of hours of first aid training I’d received over the years. From Boy Scouts to wilderness first aid on a NOLS course in that very mountain range to a wilderness first responder course in college. Gabe shared similar training and our mutual background in wilderness medicine was a critical element to our partnership.  We would never have considered such a daunting, committing route as the Wind River High Route without a solid ability to respond to the risk exposure the route presented. We knew the margin for error was exceptionally low and the consequence of an injury or accident was very high. Our training in wilderness medicine and emergency response empowered us to realistically assess the gravity of potential injuries and determine if the route was feasible. Armed with the knowledge that we could help one another out if shit hit the fan, we decided to chase the speed record on the route. And as luck would have it, shit did indeed hit the fan.

As I helped Gabe up out from the rocks he moaned and held his chest. He had jumped from a boulder onto a patch of snow and the impact of the landing had punched a deep hole in the ice and snow. He had been leaning forward and In doing so, he landed straight on his ribs. He was alive, but in visible pain. Gabe groaned and said, “on the bright side, I didn’t hear anything break…but I also didn’t hear this break” – a snapped trekking pole dangled from his hand. I breathed a sigh of relief that I didn’t have to deal with a broken femur poking out of his leg and blood squirting everywhere, which I had expected to find.

 I looked at the pole Gabe was holding. Then I looked up. And around. We were 15 hours into our push, part way off a pass, in the most remote part of one of the most remote mountain ranges in the lower 48. We had just traveled around 20 heinous and grueling off-trail miles. Most of those miles had been on suncupped snow and long boulder fields. Whether or not Gabe had a broken rib, he was clearly not well. Thankfully, he could still move. Neither of us knew what the correct decision was, but we knew that standing in a boulder field at 11,000 feet as night fell was not it. I handed Gabe one of my poles and we made our way painstakingly slowly to the lake below.

Upon reaching the lake, we sat for food and to collect ourselves. Gabe was injured, but could still move. Running and scrambling were painful, but walking was fine. We sat together, mosquito head nets obscuring our vision as hundreds of bloodthirsty monsters tried to make us a little bit more miserable. The route, were we to continue, would be 75 miles of high elevation off-trail wandering and rough singletrack. To cover that terrain in 30 hours, we needed to exclusively run and scramble. Even fully healthy, traversing the next section of frustrating bushwacks, snowy passes, and pumping rivers would be a tall order. Acknowledging the uncertainties and risks we would be in if we continued our push, we decided to bail.

Our decision put us on a whole new journey. Reaching the nearest trailhead would require another five miles of off trail travel over a glaciated 12,000 ft pass, followed by another 20 miles on trail. Our new goal of “let’s get out of here alive” consisted of thousands of feet of kicking steps into snow at 11,000 ft at midnight, multiple river crossings, a two-hour bivvy in near-freezing temps, and a massive amount of moans from Gabe. In the end we covered 54 miles over 32 hours of moving, but most importantly we made it home safe.

There is no denying how unbelievably lucky Gabe and I were to make it out of the Winds with nothing but a cracked rib. Our plan had been to go lighter and faster than anyone had ever gone on that route. We knew our chances of success were very small. We also knew that because we carried little more than food, some extra layers, and bivvy sacks, the amount of risk we were accepting was tremendous. Without a background in wilderness medicine, we would have never ventured off into the mountains. Our backgrounds made us more aware of the situations that could arise, and prepared us to act in the event that something tragic happened. 

Receiving training in wilderness first aid is absolutely necessary for any trail runner or mountain adventurer. The situations faced in a wilderness setting differ vastly from those of our normal lives. My time on the Wind River High Route drove home this point. Before every mountain excursion, my mind races through potential injuries and what my response would be. A background in wilderness first aid not only allows you to respond during those “oh shit” moments, it also makes you check yourself before striking off at the trailhead. And most importantly, it allows us to help our friends and strangers in times of need. All of us inclined to time in wild places will eventually find ourselves needing to help someone, or receive help ourselves. As runners, we love going light and carrying less, but we should all think deeply about the risks we choose, the skills we have to respond with, and the gear we carry to keep ourselves and others safe. 

When I think back to the Wind River High Route, the first thing I recall is not Gabe’s injury. Instead, it’s gazing down a wildflower meadow to watch a glacier calve into a lake at 11,000 ft. I remember wonderful, rambling conversations with a friend as we traverse the Gannet Glacier, the largest glacier in the Rocky Mountains. I reminisce on how hard I pushed myself while traveling through the most rugged, raw, and intimidating landscape I have ever encountered. Mountain travel is one of the most pure and gratifying pursuits I know. Developing all the mountain skills to make informed decisions about the risks and the rewards of our pursuits will sometimes mean that what’s safe will not always equate with success. But, in the mountains we play the long game. We do it for the love, for the challenge, to be with our people, and at the end of the day, the most important thing is that we all make it back to the trailhead. 

Jeff Mogavero is a runner, writer, and river surfer who’s mountain ramblings bring levity, insight, and passion to our community. Read more of his words at https://www.jeffmogavero.com/

Looking to grow your Wilderness First Aid Skill Set?

Check out Aspire’s 3-day runner centric, Sucia Island WFA Course

Categories
Blog gear Highlights Preparation Runner Resources Trail Skills and Equipment

Trail Running Gear Review: rabbit FKT short

The right gear can be the difference between an incredible journey through the backcountry and a miserable slog on the trail. While guiding and exploring, we’ve found some favorites and not-so-favorites. We’re sharing detailed gear reviews so you can go prepared.

“There’s no such thing as bad weather, only unsuitable clothing.” -Alfred Wainwright.

The Gear: rabbit FKT short

The Features:
-94% poly/ 6% spandex woven fabric
-rabbitKNIT brief liner
-back pocket measures 6.5″ x 4.5″ with a 5.5″ opening, plus two side pockets and 1 internal pocket
– 3″ inseam (all sizes)
– flat waistband with internal drawstring

Our Take:
These shorts are so comfortable! I love the breezy fabric and unobtrusive liner. The material is breathable and wicks incredibly well, meaning you stay comfortable while working hard in the heat. At the same time, there’s enough weight to the material that they hold up to cooler temperatures.

Crucially, on 30+ mile days in variable weather I’ve experienced no chafing. The interior liner is comfortable. The padding around the waistband is soft, and makes for a pleasantly snug fit.

running shorts, gear revie
Pockets galore!

For shorter runs, I love leaving the vest behind and traveling light. These shorts pull ahead of other models and let their pocket game shine with four functional pouches for your trail needs. The iPhone 11 fits easily in the back pocket, and the two side pockets have room for trail snacks. The interior key pocket seals the deal.

At this point my pair of FKT shorts have ~700 miles on them and more than a handful of epic wipeouts. Checking the seams and stitching throughout, and looking at the fabric color, I would guess a fraction of that use. Durability is key for me when considering trail gear, and honestly, I’m impressed.

The Wrap:
rabbit’s FKT short exists at the meeting of function and comfort. Given the breezy feel, snug and stylish fit (plus the day-glo green color option), and utilitarian pocket set up, I can’t think of what more (or less) I would ask for.

Trent Banks is a mountain rambler, a disc jockey, and father of two daughters, based out of Seattle, WA. He joined the Aspire Adventure Running crew in 2018. You can find him guiding trips, leading sponsored runs at running stores in the Seattle area, and working aid stations at races across the Pacific Northwest with the rest of the Aspire team. 

Be sure to check out rabbit gear at www.runinrabbit.com.